粒子聚散 · Scattered · ▶ 在线运行案例
案例合集: 三维可视化功能案例(threehub.cn)
开源仓库github地址: https://github.com/z2586300277/three-cesium-examples
**400个案例代码: ** 网盘链接
你将学到什么
- OrbitControls 相机轨道交互
- THREE.Points 粒子点渲染
- GSAP 时间轴与补间动画
- BufferGeometry 自定义顶点/索引数据
requestAnimationFrame渲染循环与resize自适应
效果说明
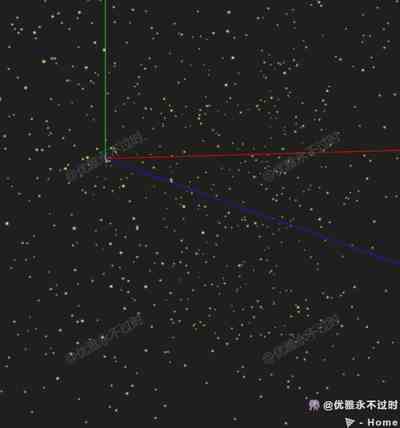
本案例演示 粒子聚散 效果:基于 WebGL 实现「粒子聚散」可视化效果,附完整可运行源码;核心用到 OrbitControls、THREE.Points、GSAP。建议先打开文首在线案例查看动态画面,再对照下方源码逐步理解。
核心概念
OrbitControls 轨道旋转缩放;开
enableDamping时每帧需controls.update()。Points 大量顶点用点精灵渲染;InstancedMesh 相同几何体批量绘制,降低 draw call。
属性插值动画,适合相机动效、UI 过渡。
实现步骤
- 搭建 Scene / Camera / Renderer 与 OrbitControls
- rAF 循环中 update 并 render
代码要点
import * as THREE from 'three'
import { OrbitControls } from 'three/examples/jsm/controls/OrbitControls.js'
import * as TWEEN from "@tweenjs/tween.js";

const DOM = document.getElementById('box')
const scene = new THREE.Scene()
const camera = new THREE.PerspectiveCamera(75, DOM.clientWidth / DOM.clientHeight, 0.1, 1000)
camera.position.set(5, 5, 12)
const renderer = new THREE.WebGLRenderer({ antialias: true, alpha: true, logarithmicDepthBuffer: true })
renderer.setSize(DOM.clientWidth, DOM.clientHeight)
DOM.appendChild(renderer.domElement)
const controls = new OrbitControls(camera, renderer.domElement)
controls.enableDamping = true
controls.dampingFactor = 0.01

window.onresize = () => {
    renderer.setSize(DOM.clientWidth, DOM.clientHeight)
    camera.aspect = DOM.clientWidth / DOM.clientHeight
    camera.updateProjectionMatrix()
}

scene.add(new THREE.AxesHelper(1000))

let particles = null
let particleSystem = null;
animate()
createParticleAnimation1()
createParticleAnimation2()

function animate() {
    controls.update()
    TWEEN.update();
    particleSystem && (particleSystem.rotation.y += 0.2)
    renderer.render(scene, camera)
    requestAnimationFrame(animate)
}

function createParticleAnimation1() {
    // 创建粒子
    const particlesGeometry = new THREE.BufferGeometry();
    const count = 3000;
    const positions = new Float32Array(count * 3);
    const colors = new Float32Array(count * 3);
    for (let i = 0; i < count; i += 3) {
        positions[i] = THREE.MathUtils.randFloat(-4, 4);
        positions[i + 1] = THREE.MathUtils.randFloat(-4, 4);
        positions[i + 2] = THREE.MathUtils.randFloat(5, 10);

        colors[i] = 253;
        colors[i + 1] = 253;
        colors[i + 2] = 0.2;
    }

    particlesGeometry.setAttribute(
        "position",
        new THREE.BufferAttribute(positions, 3)
    );
    particlesGeometry.setAttribute(
        "color",
        new THREE.BufferAttribute(colors, 3)
    );

    const particleTexture = new THREE.TextureLoader().load(HOST + '/files/images/particle.jpg');
    const pointMaterial = new THREE.PointsMaterial({
        size: 0.1,
        sizeAttenuation: true,
        transparent: true,
        opacity: 1,
        map: particleTexture,
        alphaMap: particleTexture,
        alphaTest: 0.001,
        blending: THREE.AdditiveBlending,
        vertexColors: true,
    });

    particles = new THREE.Points(particlesGeometry, pointMaterial);
    scene.add(particles);

    const particleStartPositions = particlesGeometry.getAttribute("position");
    for (let i = 0; i < particleStartPositions.count; i++) {
        const tween = new TWEEN.Tween(positions);
        tween.to(
            {
                [i * 3]: 0,
                [i * 3 + 1]: 0,
                [i * 3 + 2]: 0,
            },
            5000 * Math.random()
        );

        tween.easing(TWEEN.Easing.Exponential.In);
        tween.delay(2000);
        tween.onUpdate(() => {
            particleStartPositions.needsUpdate = true;
        })

        tween.start();
    }
}

function createParticleAnimation2() {
    // 创建粒子系统
    const particleCount = 2000; // 粒子数量
    const particles = new THREE.BufferGeometry();
    const particleTexture = new THREE.TextureLoader().load(HOST + '/files/images/particle.jpg');
    const pointMaterial = new THREE.PointsMaterial({
        size: 0.1,
        sizeAttenuation: true,
        transparent: true,
        opacity: 0,
        map: particleTexture,
        alphaMap: particleTexture,
        alphaTest: 0.001,
        blending: THREE.AdditiveBlending,
        vertexColors: true,
    });

    const cubeWidth = 0.5;
    const cubeHeight = 2;
    const positions = new Float32Array(particleCount * 3);
    const colors = new Float32Array(particleCount * 3);
    for (let i = 0; i < particleCount; i += 3) {
        const angle = Math.random() * Math.PI * 2;
        const radius = Math.random() * cubeWidth;

        // 根据圆柱体的位置、半径和高度计算粒子的位置
        const x = Math.cos(angle) * radius;
        const y = THREE.MathUtils.randFloat(-cubeHeight / 2, cubeHeight / 2);
        const z = Math.sin(angle) * radius;

        positions[i] = x;
        positions[i + 1] = y;
        positions[i + 2] = z;

        colors[i] = 253;
        colors[i + 1] = 253;
        colors[i + 2] = 0.2;
    }

    particles.setAttribute("position", new THREE.BufferAttribute(positions, 3));
    particles.setAttribute("color", new THREE.BufferAttribute(colors, 3));

    // 创建粒子系统对象
    const initVec = new THREE.Vector3(0, 0, 0);
    particleSystem = new THREE.Points(particles, pointMaterial);
    particleSystem.position.copy(initVec);
    scene.add(particleSystem);
    const tween = new TWEEN.Tween(pointMaterial);
    tween
        .to({ opacity: 1 }, 4 * 1000)
        .delay(2000)
        .onUpdate(() => {
            pointMaterial.needsUpdate = true;
        })
        .onComplete(() => {
            const tweenOut = new TWEEN.Tween(pointMaterial)
                .to({ opacity: 0 }, 2 * 1000)
                .onUpdate(() => {
                    pointMaterial.needsUpdate = true;
                })
                .onComplete(() => {
                    scene.remove(particleSystem);
                    if (particles) scene.remove(particles);
                });

            tweenOut.start();
        });
    tween.start();
}
完整源码:GitHub
小结
- 本文提供 粒子聚散 完整 Three.js 源码与在线 Demo,建议先运行案例再改 uniform/参数做二次实验
- 更多 Three.js 实战案例见 three-cesium-examples 合集 与 GitHub 开源仓库