图片粒子 · Image Particle · ▶ 在线运行案例
案例合集: 三维可视化功能案例(threehub.cn)
开源仓库github地址: https://github.com/z2586300277/three-cesium-examples
**400个案例代码: ** 网盘链接
你将学到什么
- ShaderMaterial 自定义着色器实现核心视觉效果
- OrbitControls 相机轨道交互
- THREE.Points 粒子点渲染
- Canvas 动态纹理贴图
- BufferGeometry 自定义顶点/索引数据
requestAnimationFrame渲染循环与resize自适应
效果说明
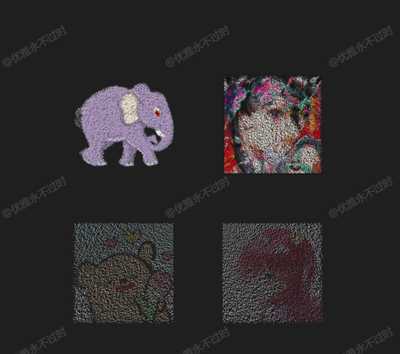
本案例演示 图片粒子 效果:用 Canvas 2D 绘制内容并实时映射为 Three.js 纹理;核心用到 ShaderMaterial、OrbitControls、THREE.Points。建议先打开文首在线案例查看动态画面,再对照下方源码逐步理解。
核心概念
- Scene / Camera / WebGLRenderer 构成最小渲染闭环;大场景可开
logarithmicDepthBuffer缓解 Z-fighting。 - ShaderMaterial 通过
uniforms+ 自定义 GLSL 控制逐像素/逐点效果;透明粒子常配合depthTest: false。 - OrbitControls 提供轨道旋转/缩放;开启
enableDamping后需在 animate 中controls.update()。 - THREE.Points 将每个顶点渲染为可控大小的粒子;可用自定义 attribute(如
u_index)驱动片元/顶点动画。 - CanvasTexture 每帧或按需把 2D Canvas 内容上传 GPU,适合动态文字、图表、视频帧贴图。
实现步骤
- 搭建 Scene、PerspectiveCamera、WebGLRenderer,挂载 canvas 并处理
resize - 定义 uniforms / onBeforeCompile 或 ShaderMaterial,编写 GLSL 与材质参数
- 创建 OrbitControls(及 Raycaster 等交互控件,若源码包含)
- 在
requestAnimationFrame循环中更新状态并 render(Cesium 为viewer.render或自动渲染)
代码要点
import * as THREE from 'three'
import { OrbitControls } from 'three/examples/jsm/controls/OrbitControls.js'

const box = document.getElementById('box')

const scene = new THREE.Scene()

const camera = new THREE.PerspectiveCamera(50, box.clientWidth / box.clientHeight, 0.1, 1000)

camera.position.set(0, 0, 10)

const renderer = new THREE.WebGLRenderer({ antialias: true, alpha: true, logarithmicDepthBuffer: true })

renderer.setSize(box.clientWidth, box.clientHeight)

box.appendChild(renderer.domElement)

const controls = new OrbitControls(camera, renderer.domElement)

controls.enableDamping = true

animate()

function animate() {

  requestAnimationFrame(animate)

  controls.update()

  renderer.render(scene, camera)

}

window.onresize = () => {

  renderer.setSize(box.clientWidth, box.clientHeight)

  camera.aspect = box.clientWidth / box.clientHeight

  camera.updateProjectionMatrix()

}

// 粒子系统配置
const config = {
    imageUrl: HOST + 'files/author/z2586300277.png',
    targetSize: 2,      // 缩放目标大小
    depth: 0.3,           // 深度范围
    pointSize: 0.001,   // 粒子基础大小
    sizeScale: 0.5,       // 粒子大小缩放系数
    color: 0xff0000,    // 自定义颜色
    useCustomColor: false,
    intensity: 1.1,
    particleGap: 6,     // 粒子间隔(1-10, 值越大粒子越少)
    particleOpacity: 0.8  // 粒子透明度
};


createParticles(config, particles => {
    particles.position.set(-1.5, 1.5, 0);
    scene.add(particles);
});

createParticles({
    ...config,
    imageUrl: HOST + 'files/author/FFMMCC.jpg',
},
particles => {
    particles.position.set(1.5, 1.5, 0);
    scene.add(particles);
});

createParticles({
    ...config,
    imageUrl: HOST + 'files/author/flowers-10.jpg',
},
particles => {
    particles.position.set(-1.5, -1.5, 0);
    scene.add(particles);
});

createParticles({
    ...config,
    imageUrl: HOST + 'files/author/KallkaGo.jpg',
},
particles => {
    particles.position.set(1.5, -1.5, 0);
    scene.add(particles);
});

function createParticles(config, callback) {
    new THREE.TextureLoader().load(config.imageUrl, texture => {
        const { width: w, height: h } = texture.image;
        const scale = w >= h ? config.targetSize/w : config.targetSize/h;

        // 获取像素数据
        const canvas = document.createElement('canvas');
        const ctx = canvas.getContext('2d');
        if (!ctx) return;
        [canvas.width, canvas.height] = [w, h];
        ctx.drawImage(texture.image, 0, 0);
        const data = ctx.getImageData(0, 0, w, h).data;

        // 收集顶点和颜色数据,按间隔采样以控制粒子数量
        const [positions, colors] = [[], []];
        for(let i = 0; i < data.length; i += 4 * config.particleGap) {
            if(data[i + 3] > 0) {
                const x = (i/4 % w - w/2) * scale;
                const y = -(Math.floor(i/4/w) - h/2) * scale;
                positions.push(x, y, Math.random() * config.depth);
                colors.push(data[i]/255, data[i+1]/255, data[i+2]/255);
            }
        }

        // 创建几何体和材质
        const geometry = new THREE.BufferGeometry()
            .setAttribute('position', new THREE.Float32BufferAttribute(positions, 3))
            .setAttribute('color_list', new THREE.Float32BufferAttribute(colors, 3));

        callback(new THREE.Points(geometry, new THREE.ShaderMaterial({
            uniforms: {
                zPos: { value: 1 },
                useCustomColor: { value: config.useCustomColor },
                customColor: { value: new THREE.Color() },
                opacity: { value: config.particleOpacity },
                intensity: { value: config.intensity }
            },
            vertexShader: `
                attribute vec3 color_list;
                varying vec3 vColor;
                uniform float zPos;
                void main() {
                    vColor = color_list;
                    vec4 mvPosition = modelViewMatrix * vec4(position.xy, position.z * zPos, 1.0);
                    gl_PointSize = ${config.pointSize * config.sizeScale} * (1.0 - mvPosition.z);
                    gl_Position = projectionMatrix * mvPosition;
                }
            `,
            fragmentShader: `
                varying vec3 vColor;
                uniform bool useCustomColor;
                uniform vec3 customColor;
                uniform float opacity;
                void main() {
                    vec3 color = useCustomColor ? customColor : vColor;
                    gl_FragColor = vec4(color * vec3(${config.intensity}), opacity);
                }
            `,
            transparent: true
        })))
    })
}
完整源码:GitHub
小结
- 本文提供 图片粒子 完整 Three.js 源码与在线 Demo,建议先运行案例再改 uniform/参数做二次实验
- 更多 Three.js 实战案例见 three-cesium-examples 合集 与 GitHub 开源仓库