网格 · Grid · ▶ 在线运行案例
案例合集: 三维可视化功能案例(threehub.cn)
开源仓库github地址: https://github.com/z2586300277/three-cesium-examples
**400个案例代码: ** 网盘链接
你将学到什么
- WebGL 只画三角形 — Mesh 由三角面拼接
- 手写
BufferGeometry+Float32Array定义顶点 MeshBasicMaterial的side: DoubleSide双面渲染
效果说明
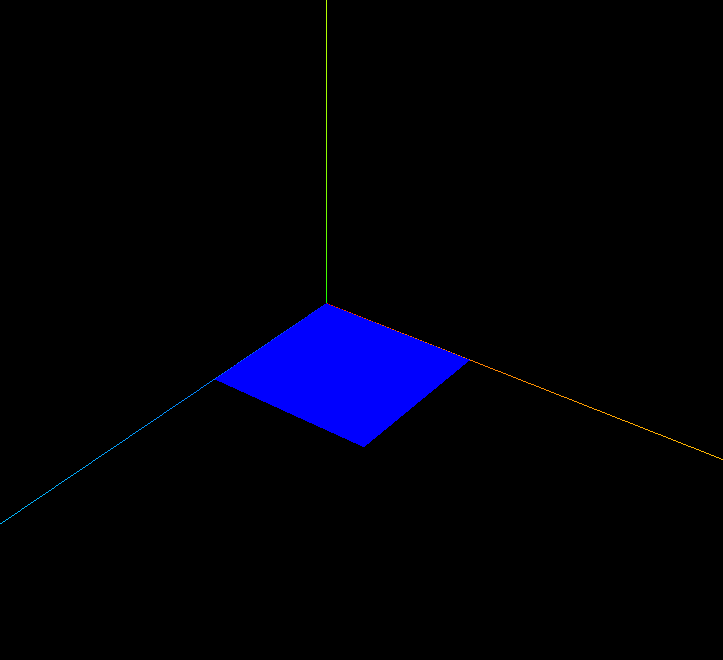
X-Z 平面上出现一个 蓝色三角形(实为两个三角形组成的矩形,本案例只定义一个三角面)。配合 OrbitControls 可旋转观察。
核心概念
GPU 渲染的基本图元是 三角形。一个矩形需要 2 个三角形 = 6 个顶点(无索引时)或 4 个顶点 + 索引。
顶点布局(Y=0 平面):

  (0,0,50) ---- (50,0,50)
     |    ╲       |
     |      ╲     |
  (0,0,0) ---- (50,0,0)

三角面1: (0,0,0) → (50,0,0) → (50,0,50)
三角面2: (0,0,0) → (0,0,50)  → (50,0,50)
本案例 只写 6 个顶点(2 个三角形) 构成完整矩形:
const vertices = new Float32Array([
    0, 0, 0,   50, 0, 0,   50, 0, 50,   // 三角面 1
    0, 0, 0,   0, 0, 50,   50, 0, 50,   // 三角面 2
]);
geometry.attributes.position = new THREE.BufferAttribute(vertices, 3);
//                                                      itemSize=3 (x,y,z)
背面剔除: 默认只渲染正面(法线朝向相机的一侧)。side: THREE.DoubleSide 双面可见,适合平面/薄片。
实现步骤
new THREE.BufferGeometry()Float32Array填入 6 顶点 × 3 分量BufferAttribute(vertices, 3)绑定到attributes.positionMeshBasicMaterial+DoubleSide→ Mesh
代码要点
import * as THREE from 'three';
import { OrbitControls } from 'three/examples/jsm/controls/OrbitControls.js'

const scene = new THREE.Scene();

// 网格模型Mesh其实就一个一个三角形(面)拼接构成
const geometry = new THREE.BufferGeometry();
const vertices = new Float32Array([
    0, 0, 0,
    50, 0, 0,
    50, 0, 50,

    0, 0, 0,
    0, 0, 50,
    50, 0, 50,
]);

geometry.attributes.position = new THREE.BufferAttribute(vertices, 3);

// 网格
const material = new THREE.MeshBasicMaterial({
    color: 0x0000ff,
    side: THREE.DoubleSide,
});
const mesh = new THREE.Mesh(geometry, material);
scene.add(mesh);


// AxesHelper
const axesHelper = new THREE.AxesHelper(150);
scene.add(axesHelper);

// 相机
const camera = new THREE.PerspectiveCamera();  //相机
camera.position.set(200, 200, 200); //相机位置
camera.lookAt(0, 0, 0);   //相机观察位置

// 渲染器
const renderer = new THREE.WebGLRenderer(); // 创建渲染器
const box = document.getElementById('box');
renderer.setSize(box.clientWidth, box.clientHeight); //渲染区域
renderer.render(scene, camera); //执行渲染
box.appendChild(renderer.domElement);;

const controls = new OrbitControls(camera, renderer.domElement);
controls.addEventListener('change', function () {
    renderer.render(scene, camera);
});
完整源码:GitHub
小结
- 本文提供 网格 完整 Three.js 源码与在线 Demo,建议先运行案例再改 uniform/参数做二次实验
- 更多 Three.js 实战案例见 three-cesium-examples 合集 与 GitHub 开源仓库