cesium融合three · Cesium+Three · ▶ 在线运行案例
案例合集: 三维可视化功能案例(threehub.cn)
开源仓库github地址: https://github.com/z2586300277/three-cesium-examples
**400个案例代码: ** 网盘链接
你将学到什么
requestAnimationFrame渲染循环与resize自适应
效果说明
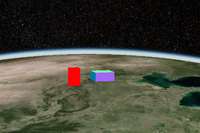
本案例演示 cesium融合three 效果:基于 WebGL 实现「cesium融合three」可视化效果,附完整可运行源码。建议先打开文首在线案例查看动态画面,再对照下方源码逐步理解。
核心概念
Viewer 封装地球、相机、图层;可关闭 animation/timeline 等 UI 精简界面。
ImageryLayer 叠加 XYZ/WMTS/ArcGIS 等底图,
imageryLayers.add/remove管理。
实现步骤
- 初始化
Cesium.Viewer与底图图层 - 添加 Entity / Primitive / DataSource 等业务对象
- 按需
camera.flyTo定位视角
代码要点
import * as Cesium from 'cesium'
import * as THREE from 'three'

const cesiumBox = document.getElementById('box')

const threeBox = document.createElement('div')

Object.assign(threeBox.style, {

    position: 'absolute',

    pointerEvents: 'none',

    zIndex: 1,

    width: '100%',

    height: '100%'

})

cesiumBox.appendChild(threeBox)

const minWGS84 = [115.23, 39.55] // 最小经纬度

const maxWGS84 = [116.23, 41.55] // 最大经纬度

initThree(threeBox,initCesium(cesiumBox))

// 初始化Cesium
function initCesium() {

    const viewer = new Cesium.Viewer(cesiumBox, {
        baseLayerPicker: false,
        imageryProvider: false, // 替换 baseLayer: false
        infoBox: false
    })

    viewer.imageryLayers.addImageryProvider(

        new Cesium.WebMapTileServiceImageryProvider({

            url: "https://t0.tianditu.gov.cn/img_w/wmts?tk=c4e3a9d54b4a79e885fff9da0fca712a",
            layer: "img",
            style: "default",
            format: "tiles",
            tileMatrixSetID: "w"

        })

    )

    viewer.camera.flyTo({

        destination: Cesium.Cartesian3.fromDegrees((minWGS84[0] + maxWGS84[0]) / 2, (minWGS84[1] + maxWGS84[1]) / 2 - 1, 200000),

        orientation: { heading: Cesium.Math.toRadians(0), pitch: Cesium.Math.toRadians(-60), roll: Cesium.Math.toRadians(0) }

    })

    return viewer

}

function initThree(threeBox, viewer) {

    const scene = new THREE.Scene()

    const camera = new THREE.PerspectiveCamera(45, threeBox.clientHeight / threeBox.clientHeight, 1, 100000000)

    const renderer = new THREE.WebGLRenderer({ alpha: true })

    renderer.setSize(threeBox.clientWidth, threeBox.clientHeight)

    threeBox.appendChild(renderer.domElement)

    const group = new THREE.Group()

    const box = new THREE.Mesh(new THREE.BoxGeometry(4, 4, 4), new THREE.MeshNormalMaterial())

    group.add(box)

    const box2 = new THREE.Mesh(new THREE.BoxGeometry(2, 2, 8), new THREE.MeshBasicMaterial({ color: 0xff0000 }))

    box2.position.x += 6

    group.add(box2)

    group.cesium = { minWGS84, maxWGS84 }

    scene.add(group)

    group.scale.set(15000, 15000, 15000)

    function render() {

        syncCesiumThree(group, camera, viewer)

        renderer.render(scene, camera)

        requestAnimationFrame(render)

    }

    window.onresize = () => {

        renderer.setSize(threeBox.clientWidth, threeBox.clientHeight)

        camera.aspect = threeBox.clientWidth / threeBox.clientHeight

        camera.updateProjectionMatrix()

    }

    render()

}

/* 相机同步 */
function syncCesiumThree(group, camera, viewer) {

    // 更新相机位置
    camera.fov = Cesium.Math.toDegrees(viewer.camera.frustum.fovy)

    // 笛卡尔坐标转换
    const cartToVec = cart => new THREE.Vector3(cart.x, cart.y, cart.z)

    // 获取经纬度范围
    const { minWGS84, maxWGS84 } = group.cesium

    // 转换为笛卡尔坐标
    const center = Cesium.Cartesian3.fromDegrees((minWGS84[0] + maxWGS84[0]) / 2, (minWGS84[1] + maxWGS84[1]) / 2)

    // 获取定向模型的前进方向
    const centerHigh = Cesium.Cartesian3.fromDegrees((minWGS84[0] + maxWGS84[0]) / 2, (minWGS84[1] + maxWGS84[1]) / 2, 1)

    // 左下坐标
    const bottomLeft = cartToVec(Cesium.Cartesian3.fromDegrees(minWGS84[0], minWGS84[1]))

    // 左上坐标
    const topLeft = cartToVec(Cesium.Cartesian3.fromDegrees(minWGS84[0], maxWGS84[1]))

    // 方向向量
    const latDir = new THREE.Vector3().subVectors(bottomLeft, topLeft).normalize()

    // 设置位置
    group.position.copy(center)

    // 看向中心
    group.lookAt(centerHigh.x, centerHigh.y, centerHigh.z)

    // 设置方向
    group.up.copy(latDir)

    // 更新相机
    camera.matrixAutoUpdate = false

    // 相机视图矩阵
    const cvm = viewer.camera.viewMatrix

    // 相机逆视图矩阵
    const civm = viewer.camera.inverseViewMatrix

    camera.matrixWorld.set(
        civm[0], civm[4], civm[8], civm[12],
        civm[1], civm[5], civm[9], civm[13],
        civm[2], civm[6], civm[10], civm[14],
        civm[3], civm[7], civm[11], civm[15]
    )

    camera.matrixWorldInverse.set(
        cvm[0], cvm[4], cvm[8], cvm[12],
        cvm[1], cvm[5], cvm[9], cvm[13],
        cvm[2], cvm[6], cvm[10], cvm[14],
        cvm[3], cvm[7], cvm[11], cvm[15]
    )

    camera.updateProjectionMatrix()

}
完整源码:GitHub
小结
- 本文提供 cesium融合three 完整 Cesium.js 源码与在线 Demo,建议先运行案例再改 uniform/参数做二次实验
- 更多 Cesium.js 实战案例见 three-cesium-examples 合集 与 GitHub 开源仓库